How to Successfully Test InVision Prototypes With Real People
Published July 22, 2020 by Andrea in User Testing
Updated on September 4, 2023

Learn what the 5 most important settings to run successful and efficient user tests on your shiny new prototype built in InVision are. But before we dive in, let’s first answer the most important question in terms of timing:
When Should I Start Testing My InVision Prototype?
User Testing in the prototyping phase not only saves you a lot of money, but it is also the most time-efficient way to improve your product. Thus, we advise you to start testing as soon as possible.
Not everything has to work in your prototype – just focus on the most important use case of your product to start. The best is to create and improve your prototype and do your user testing in close association.
Start testing in minutes and get results within hours. Tap into our pool of 145k+ testers and watch videos of users interacting with your product on their devices. Discover what’s working for your product, and what’s not!
Start your free trialGenerating a Shareable Link in InVision
If you want to test your prototype, you need to generate a link to share with your test participants. To generate a shareable link, open the prototype you’d like to test in InVision.
Click the green Share button at the top right of your dashboard.

A new window pops up where you can either invite people to a project or share the project via a link. Click on Link Settings at the bottom right corner. Make sure that you see all available settings by clicking on More Options.
Let’s take a closer look at the five most important link-sharing settings for testing your InVision Prototype.
Setting #1: Disable Allow Commenting on Screens
This option enables people to provide feedback on the prototype. Although this feature might be useful when sharing your prototype with your team or your customers and gather input from them, this option sometimes distracts testers from their task. Testers won’t recognize that this option isn’t an actual part of your prototype. And you don’t want to spend valuable time watching a tester explaining InVision functionality to you.
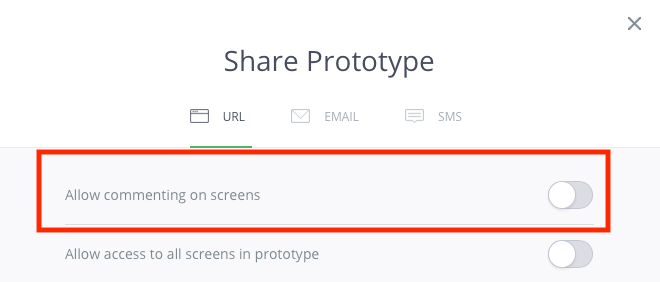
Therefore, we suggest disabling the Allow commenting on screens option if you’re testing your InVision prototype with Userbrain.
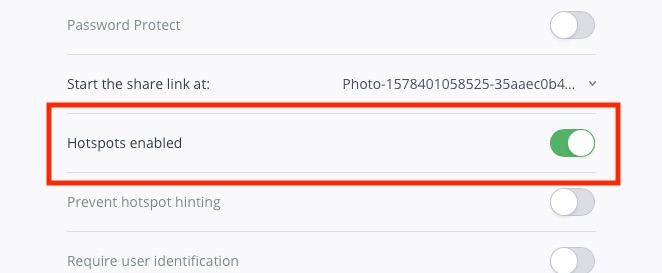
Setting #2: Enable Hotspots
Without enabling hotspots your testers wouldn’t be able to click through your prototype, so you must make sure that this setting is turned on.
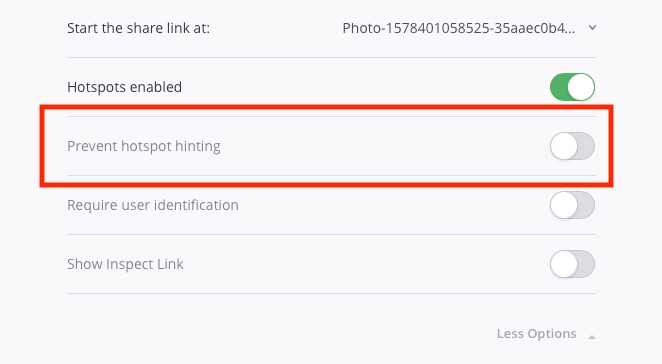
Setting #3: Prevent Hotspot Hinting
When user testing your prototype, you don’t want to influence the user experience by highlighting certain elements to them. But if the Prevent hotspot hinting option is enabled, anytime a user clicks in an area that is not interactive, the interactive areas are outlined, thus indicating clickable areas.
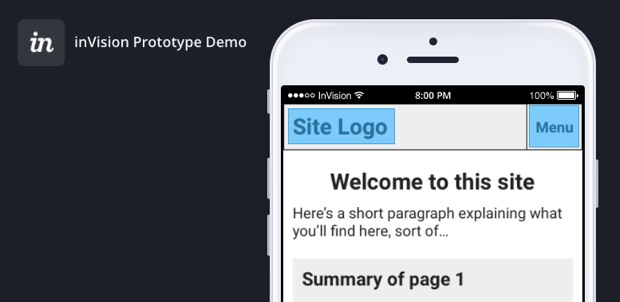
By disabling the setting in InVision, you make sure that you don’t interfere with the user experience.
Setting #4: Select the First Screen of Your Prototype
In most cases, a prototype has more than one page. Make sure that you’re selecting the right starting screen of your prototype in the section Start the share the link at:.
Setting #5: Disable the Show Inspect Link and Allowing Access to all Screens
The fewer elements that might distract your tester and don’t belong to your prototype, the better. If you don’t disable showing the inspect link and allowing access to all screens, these two buttons will show at the bottom right of your prototype, and you really don’t want them to distract your participants.
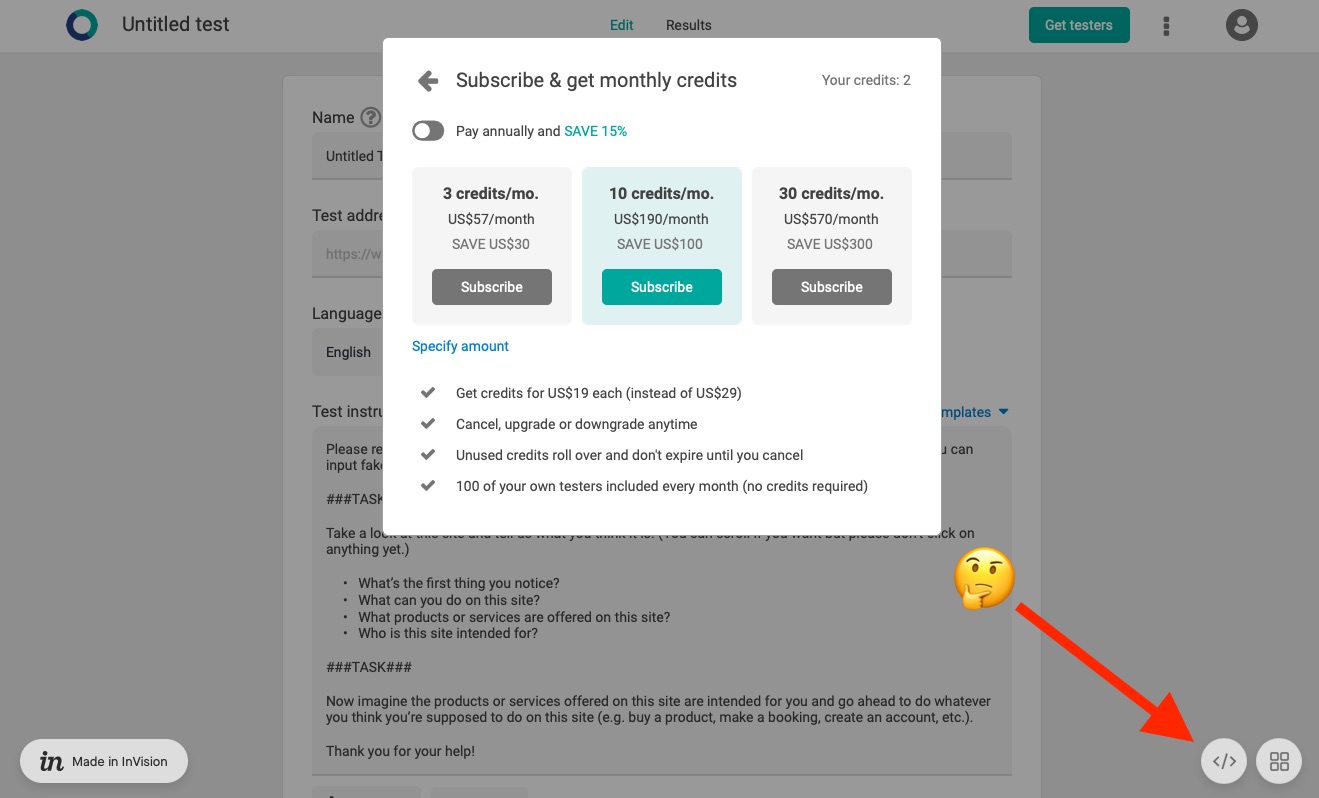
When done, your link settings for your InVision prototype test should look like this:
Next Step: Copy the Link and Share It for Testing
After adjusting the settings as mentioned, it’s time to click on Copy to copy the link and be ready to share it.

How to Test Your InVision Prototype with Real Users
Having the link of your prototype ready to be shared, it’s now time to learn from real users. You can either share your prototype link and the test scenario with friends or have a user testing platform like Userbrain do most of the work for you.
Remember, the main goal at this stage is to find problems to improve your prototype. A lot of people don’t test their solution because they’re scared of failure.
But in fact, making mistakes goes hand in hand with learning new things. It’s all about discovering the mistakes in the current prototype and learning something new from the problems that pop up to improve the solution for the future. Keep in mind that testing isn’t about likes – you want your testers to understand your product, not to evaluate it.
When user testing you basically ask somebody to use a product (a website, an app, a can opener, whatever) and think out loud while you watch them and listen carefully to what is crossing their mind.
There are two types of user tests: moderated and unmoderated tests. There are basically the same thing. The only difference lies in the way these user tests are carried out. While in moderated user tests it’s essential to have somebody present during testing to lead the participants through the tests, in the case of unmoderated tests the participants themselves take over this task.
Setting Up Your Prototype Test Scenario
One thing you’ll need, no matter if conducting a moderated or unmoderated test, is a test scenario. You have to give your test participants concrete and realistic tasks and observe them while they are trying to do these tasks.
With a prototype, it’s very likely that there are things that aren’t working yet. Think about what is already working and what you want to validate. The goal shouldn’t be “I want to test my prototype”, but rather “I want to test the navigation” or “I want to test if the users find the contact button at its current position”.
The things you decide to test within your prototype will tell you what the tasks should be.
Here’s an example test scenario for figuring out if users are able to find the contact section:
You ordered a new laptop on this website. After a few days, your laptop breaks down and you want a refund. You now want to get in touch with somebody responsible.
Your tester will then (hopefully) search for contact information and you can observe if the contact button is at the right place.
An Example of a Test Scenario for a Prototype Test
Start the test by explaining to your participants that they’re using an unfinished prototype where some things aren’t working yet. This might sound like this:
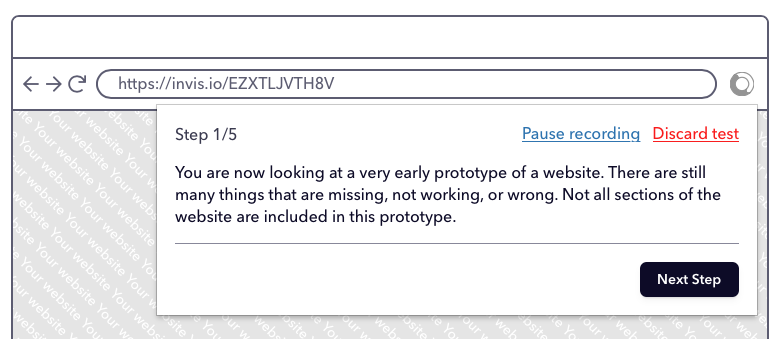
You are now looking at a very early prototype of a website. There are still many things that are missing, not working, or wrong. Not all sections of the website are included in this prototype.
If a tester lands on a page that isn’t working yet, perhaps you could ask your participants what they expect from things that aren’t ready yet, so that you can find out if your solution would match their expectations. For example, write something like this into your scenario:
Please try to perform the tasks indicated using this prototype. If you land in a section that isn’t ready yet, please explain briefly what you would have expected to find there.
To prevent your testers from getting lost or stuck, it’s important to make sure your pages are linked correctly to each other and not to something outside the prototype. In your test scenario, you can deliver a solution in case it still happens.
Should you get “stuck” on a page, you can use this link to find your way back to the homepage [Link to the first page of the prototype]
Some Questions to Ask in Your Prototype Test
- Please describe the individual items on this page. What can you do with them?
- What different pieces of information do you see here?
- What would you expect to find in the “Gifts” category?
- Please describe the individual steps you need to follow to …
- What do you think happens when you click on the link “Shipping Options”?
- What questions are you asking yourself at this moment?
- What do you think could be done with this function?
- What is the white icon in the right corner of the screen for?
- Can this solution be compared to a product you’ve already used?
- Is there something missing on this page?
The less interactivity your prototype offers, the more careful you should be when asking questions to your test participants. After all, it will only be possible to do relatively little with your prototype at first – at least if you follow our advice and test your solution as early as possible.
Testing Your Prototype With Userbrain
Userbrain is a remote user testing platform that saves you the hassle of recruiting, managing, and paying for testers to test your prototype. With Userbrain, you can access a worldwide pool of over 100k quality-assured unbiased testers.
Now we’ll now show you a step-by-step guide on how to test your prototype with Userbrain.
Step 1: After signing up, start by creating a new test.

Step 2: Assign a name to your test and paste the previously generated link into the Test URL field.
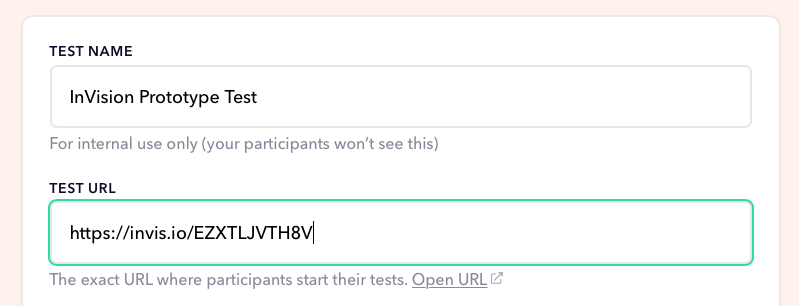
Step 3: Then select the language you want to test in and enter your previously written test instructions.
In Userbrain your testers will see your instructions like this:
Choosing the Participants for Your Prototype Test
As Userbrain offers you a pool of testers it’s now time to choose the participants you want to test with. Different options are offered:
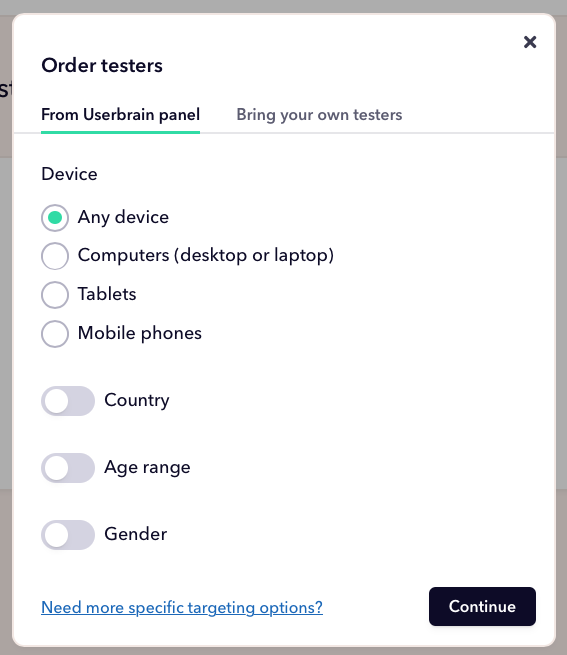
You can either choose Any Device, with which you’ll receive results very soon or you can choose from different demographics for your testers.
Demographic Targeting
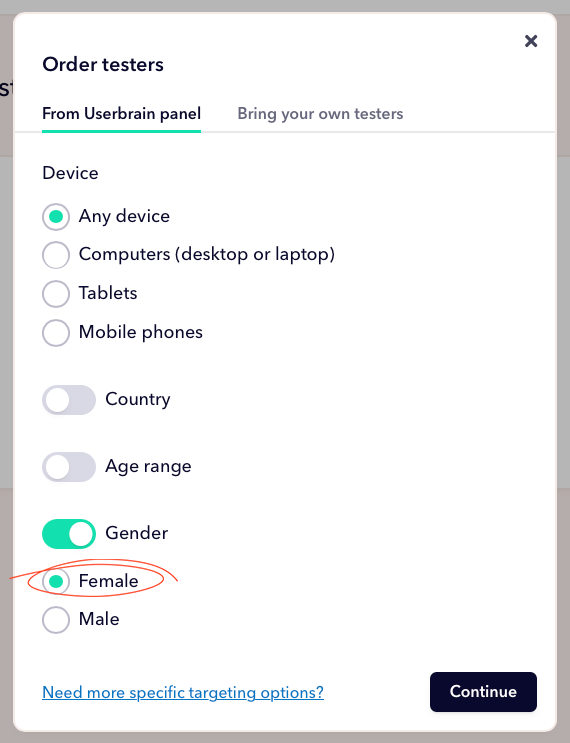
If you want to test with very specific people, you can target them with different demographics. For example, if you’re testing a prototype of a website for woman’s clothes and you want your testers to be exclusively female.
But generally speaking, testing a prototype where the main focus is on testing specific functionalities, demographic targeting isn’t that important. When used with moderation it’s fine, but try not to get obsessive with demographics.
In Userbrain this would look like this:
How Many Participants Do I Need?
Steve Krug, the author of the usability bestseller Don’t make me think! recommends testing with three test participants per round.
Here’s why:
- Finding three test participants is less work than searching for more.
- Doing more than three tests on a single day means getting snacks for the people who moderate the tests and also for those who watch the tests.
- If you test with three test participants, you can do your tests and present the results on the same day.
Keep in mind that he recommends this number of testers per round. Per round means that we test more than just once.
We’re going to select 3 testers, and we want to test our prototype on a desktop device. By clicking on Specify device type you can select the device you want to test on. We’re only going to only desktop devices. Alternatively, you can also choose tablets or mobile, or Get mixed devices. By clicking on Order 3 test videos you submit your order to start testing.
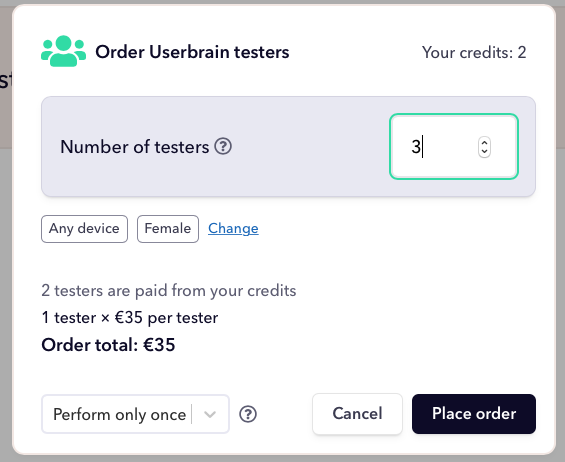
It takes around 3-4 hours for the first results to be ready.
Assessing the Tests
When watching the tester videos, the main goal is to discover as many problems as possible and to understand why these problems occur. Assessing a user test is in fact nothing else than embarking in the search of problems. But discovering a problem is actually only the starting point, because the next thing you have to do is to understand what is causing the problem.
Once you understand the cause of the problem, you’re in a good position to solve it and avoid it in the future.
Finding the Three Biggest Problems
It would be extremely costly to accurately detect and analyze all problems discovered, so try to focus instead on the three biggest problems you’ve discovered in the user tests. Of course, you can also handle the remaining problems at some time, but we suggest that you keep them from the team for now and instead focus solely on persuading your squad to take care of these big problems and not get distracted by other things. You’ll also see that it will be necessary to do more rounds of user testing once these problems have been solved.
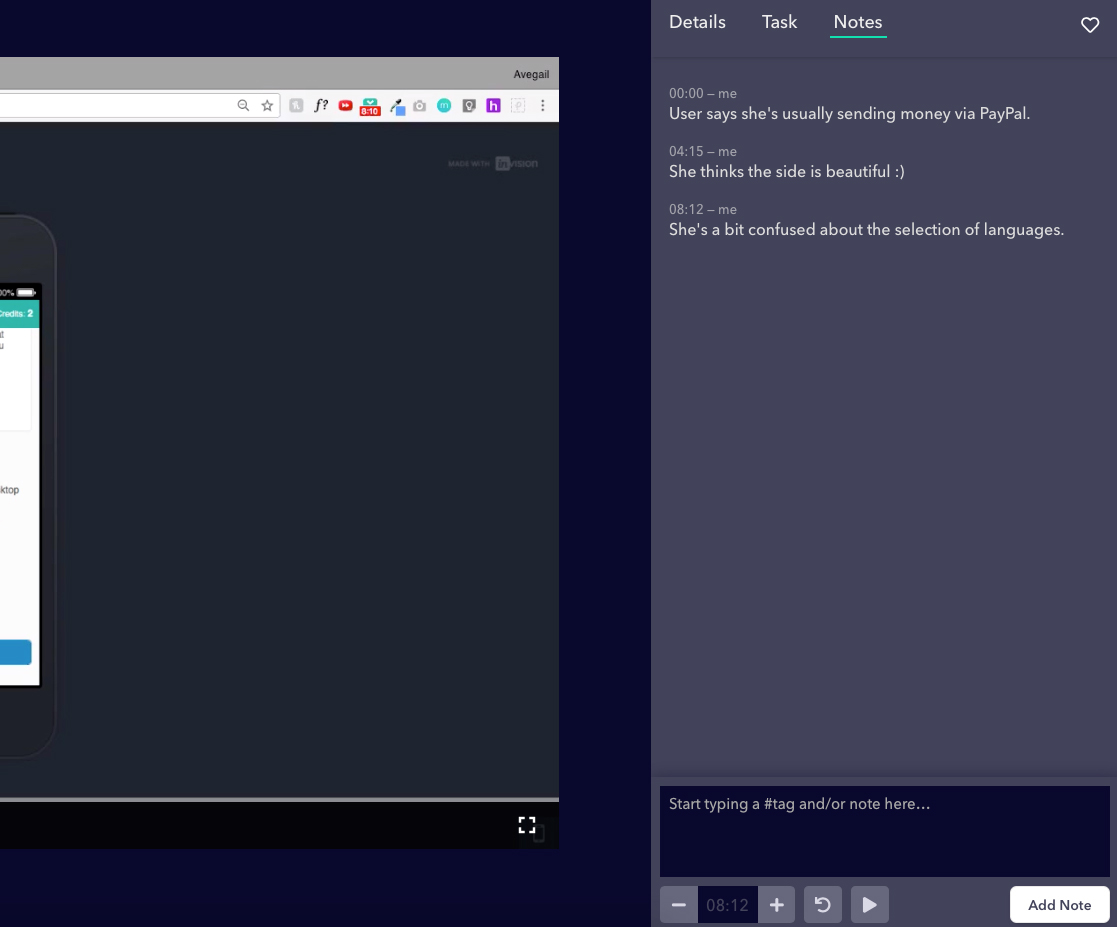
In Userbrain you can take notes when a problem crops up during testing.
What to Do After Completing Your First Test
After conducting and assessing your first user test, the most important thing to do is to not to stop testing. There are a lot of different ideas and methods when it comes to user testing – find out what best works for you, and stick to it.
Proactive usability testing is about constantly testing (and improving) whatever you’re working on while you’re working on it, whether you’re a website owner, designer, or developer. Since you’re typically still at the beginning of a project when you start testing proactively, you should not resist any newly identified problems but actually, look forward to negative usability feedback to improve your current solution.
The RITE Method
RITE stands for Rapid Iterative Testing and Evaluation. The main idea behind it is to offer a fast, powerful, and low-risk way of improving your designs. When using the RITE method, you’re testing a version of a prototype as you would normally do, but instead of waiting until the end of the study to process the findings, you make changes as soon as issues are discovered by one or two participants.
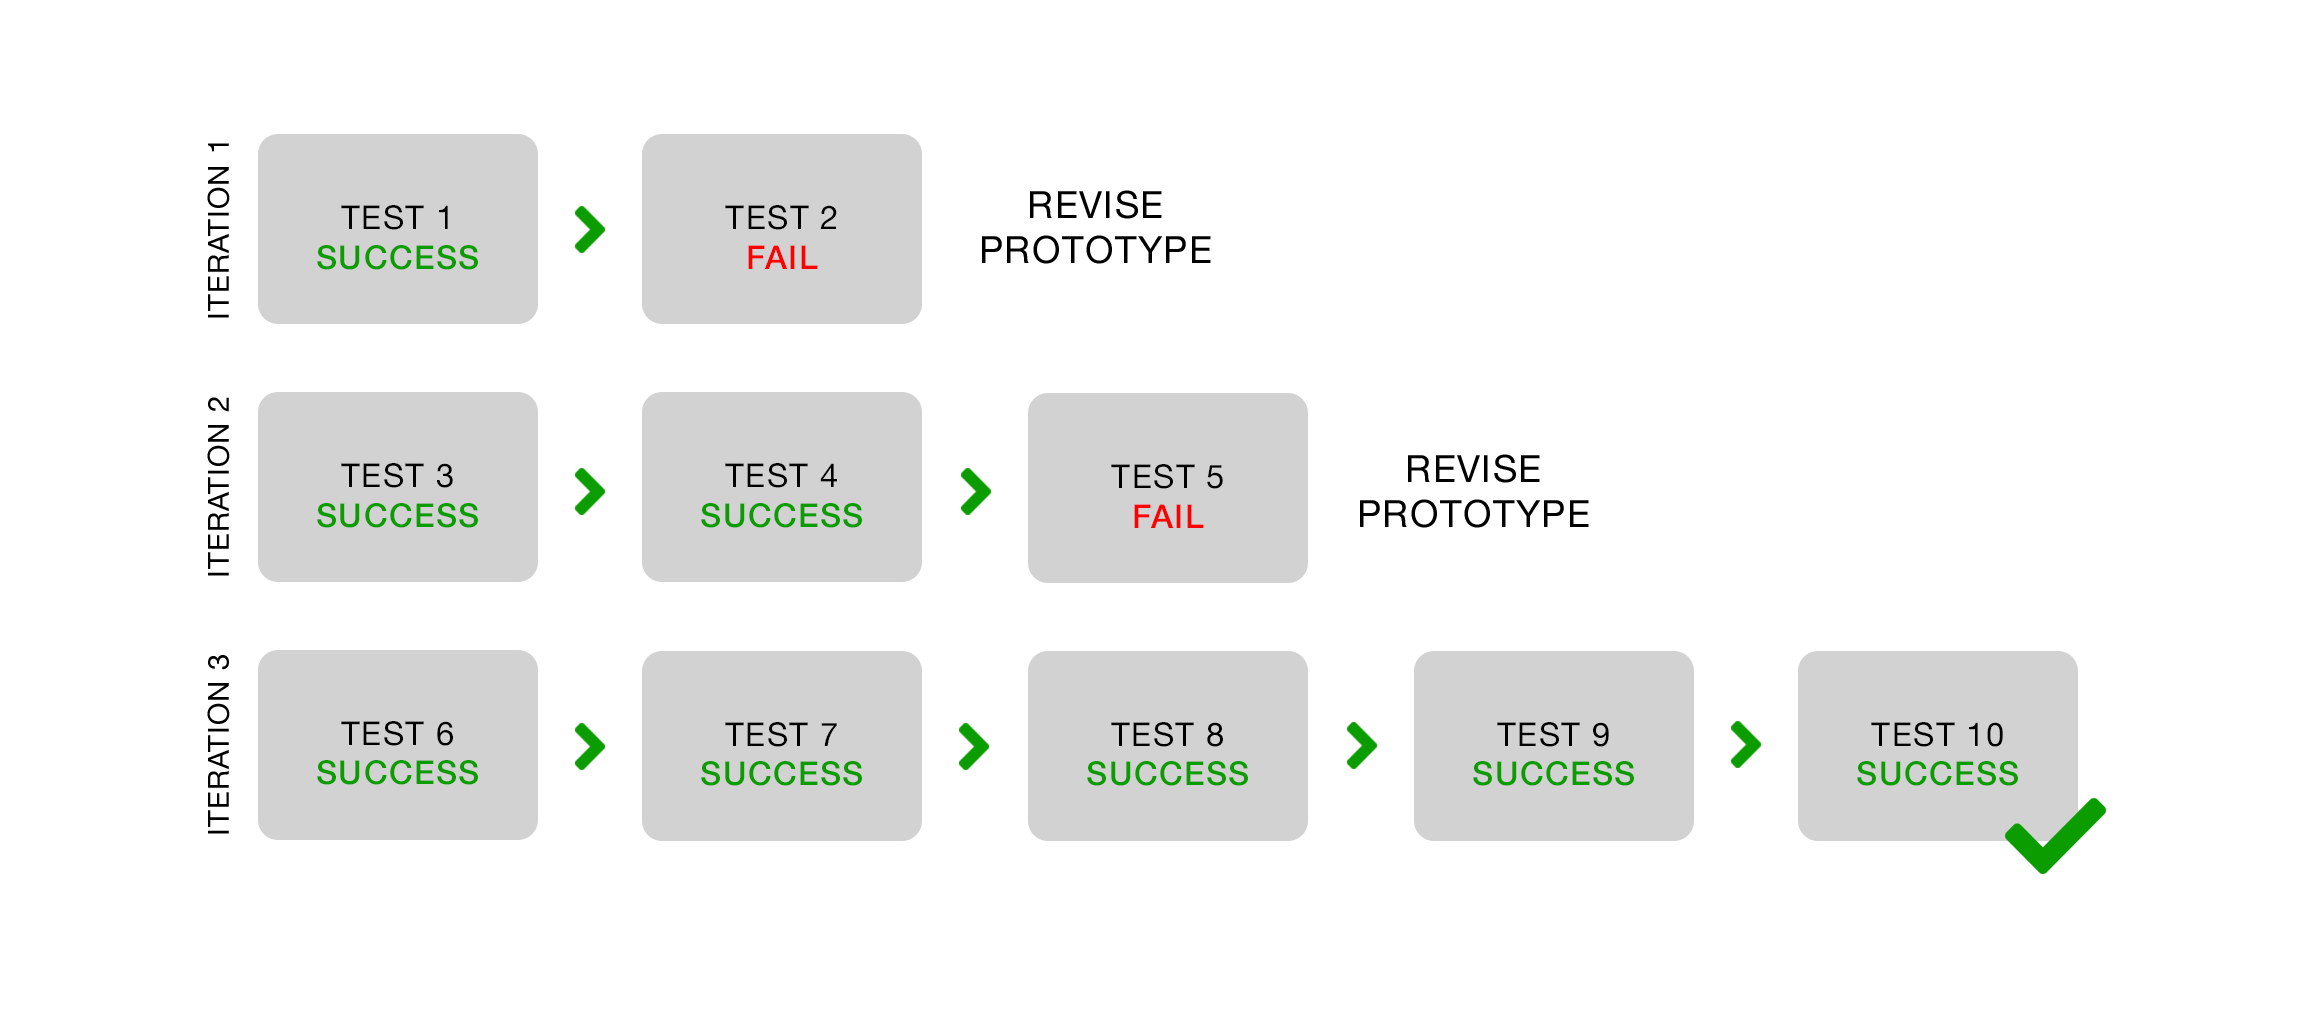
After the changes are made, you continue testing and stop again if a problem occurs. This method is perfect for testing a prototype because you can quickly test and get feedback on new solutions.
Summing up
Here are the 5 important settings for the user testing of InVision prototypes:
- Disable commenting on screens
- Enable Hotspots
- Prevent Hotspot hinting
- Make sure the correct first screen is selected
- Disable Show Inspect Link and Allow access to all screens
Once you’ve established the correct InVision settings:
- Create your task scenario
- Run your own moderated test or use a remote user testing platform
- Run a trial test with 1 participant and test with 3-6 participants per round
- Focus on the 3 biggest problems
- Follow the RITE method and test again
Back to homepage